23 advanced video tricks for Premiere Pro: Tools and tips for editors who want to shake up the timeline

The Editors

The Editors

5 Minutes

Video editing shouldn't be stale work.

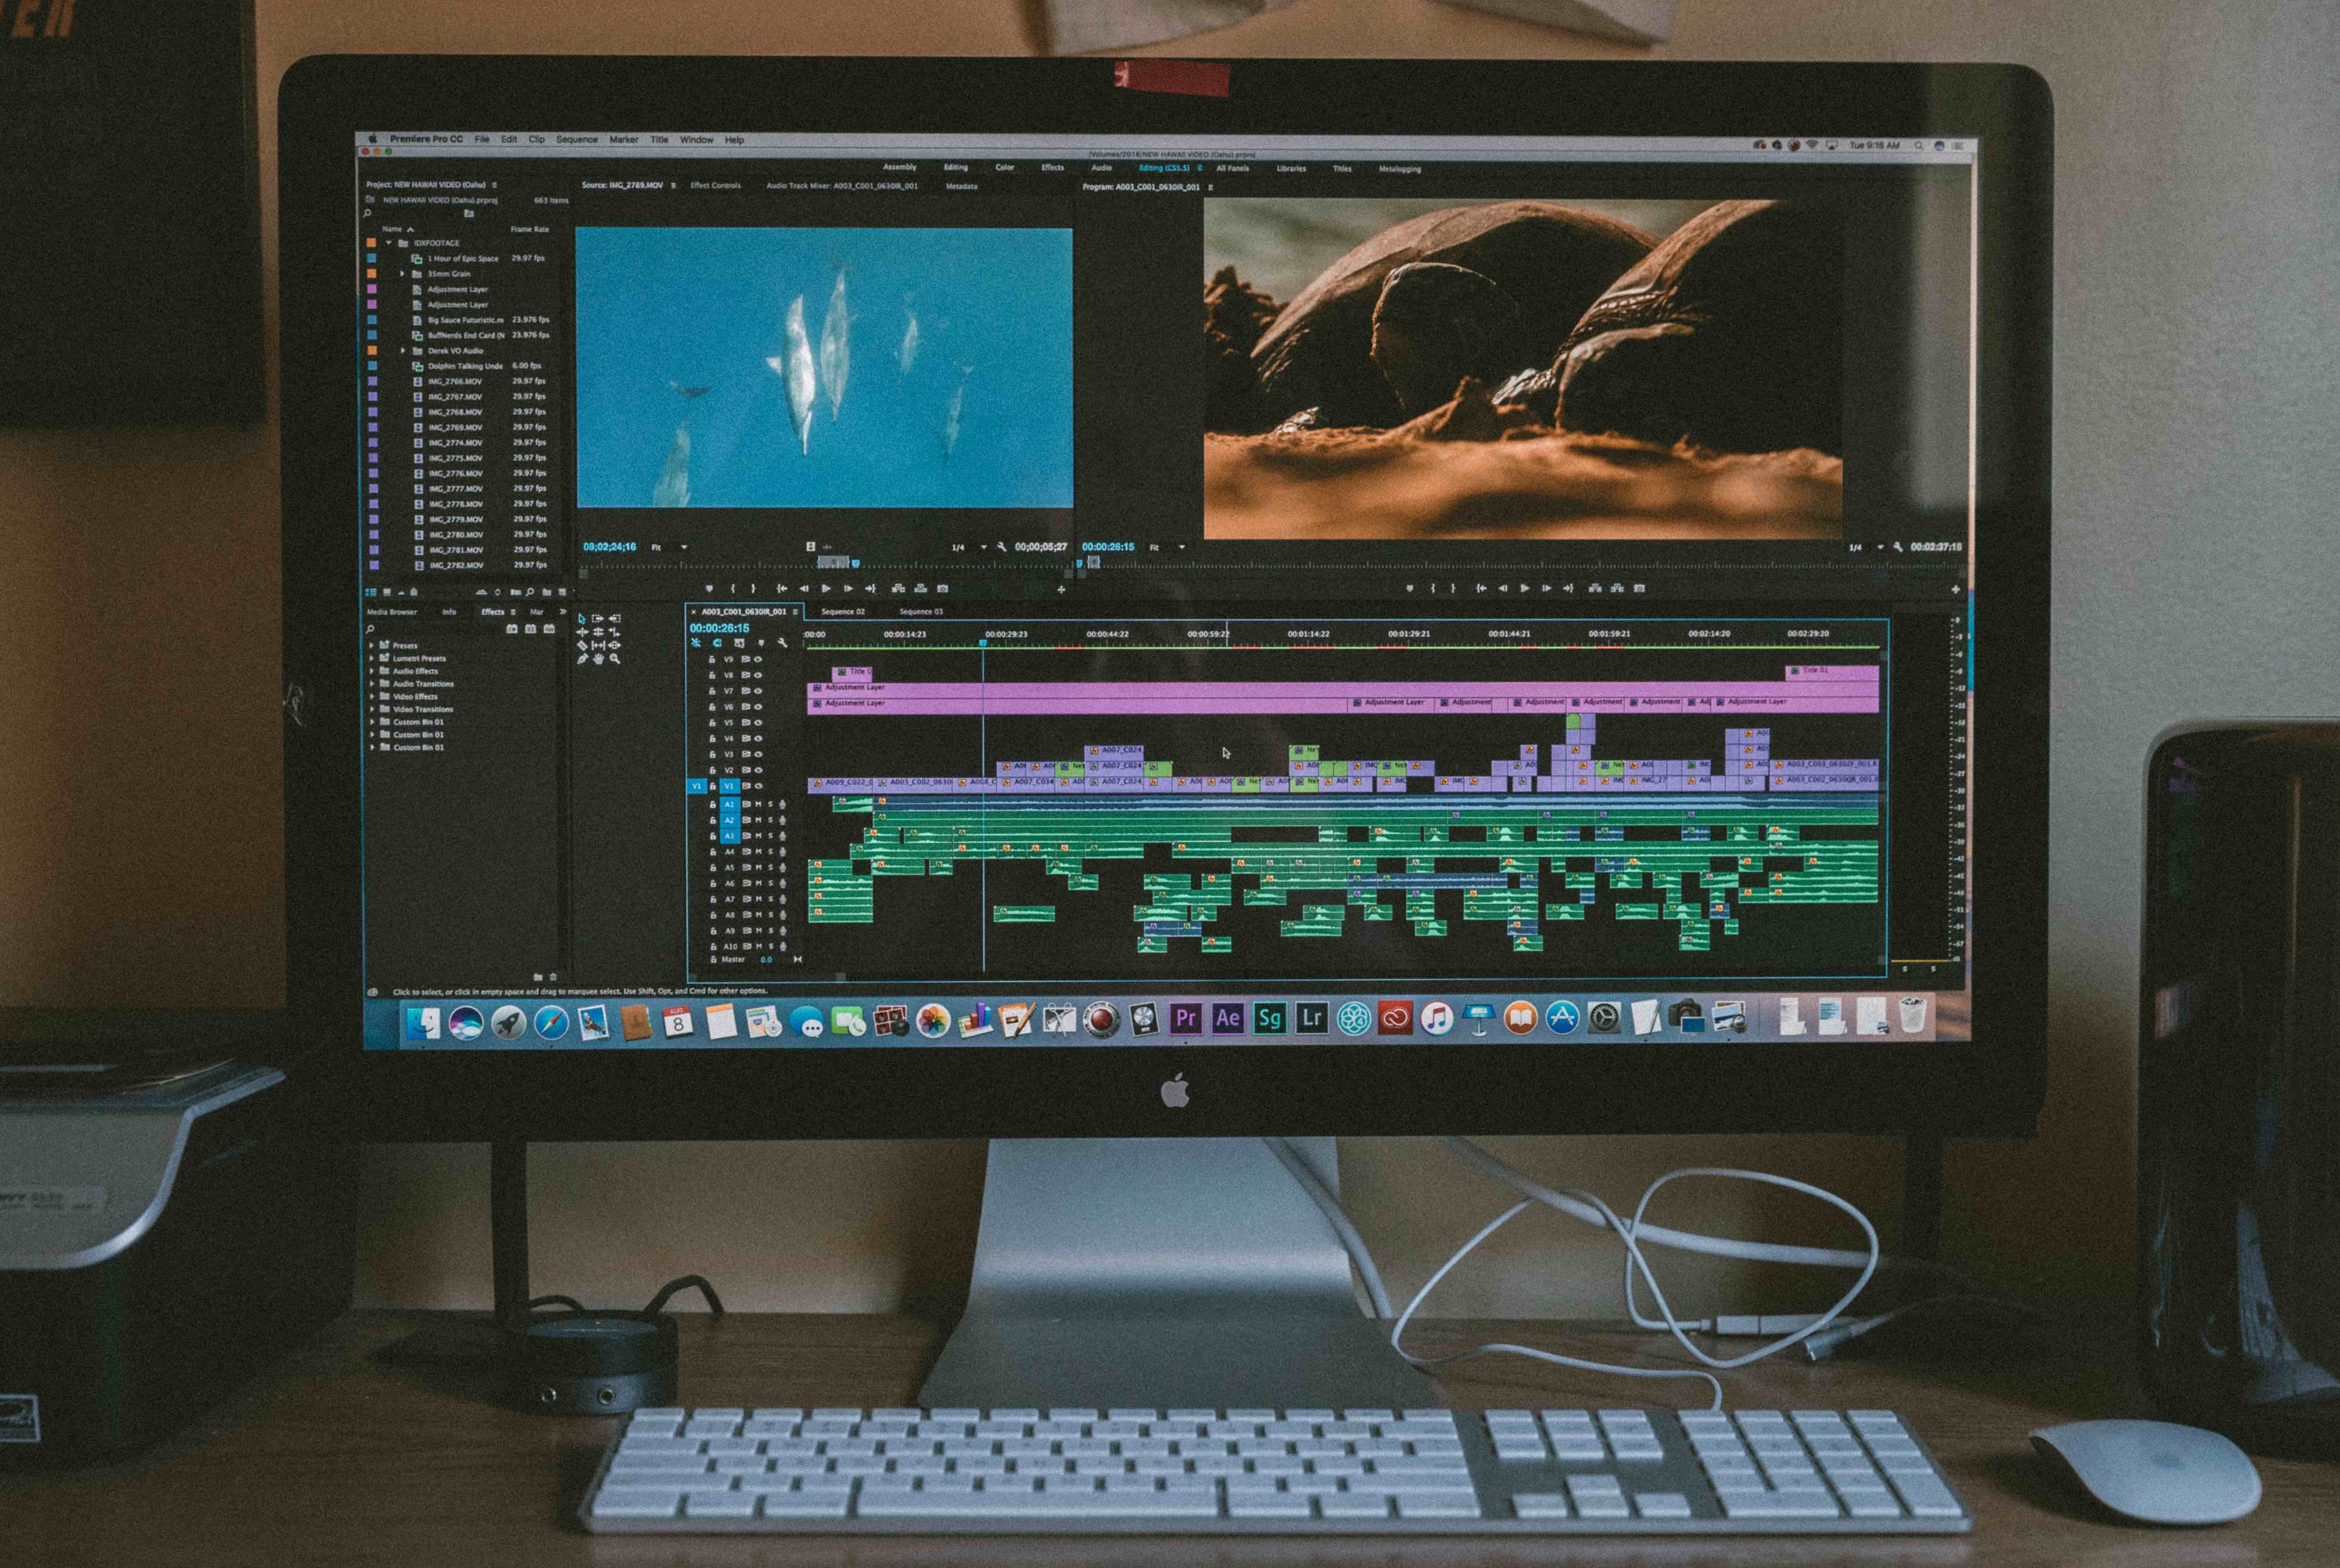
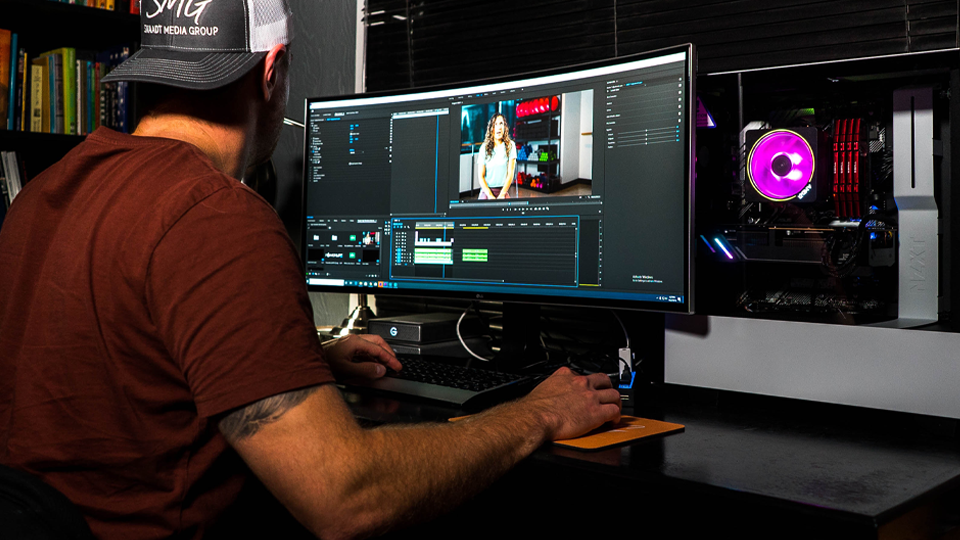
Every time you sit in front of your computer screen and open up a Premiere Pro timeline, we’re certain there’s an excitement that courses through you. But long hours in the edit bay can prove difficult, especially when you’re trying to stay creative. Video editors and post production creatives can fall into trends, utilizing the same (or similar) techniques whenever a project lands on their desk. While utilizing certain editing techniques repeatedly might eventually define a creative’s unique style, it’s important—no matter your scope of post production creative work—to help shake up the norm. In this post, we’ve rounded up some of the most useful advanced editing tricks hidden throughout Premiere Pro, so editors of every skill level can find new avenues of expression and creativity.

EFFECTS

Luma Key – Radiant color and eye-catching effects

By examining a clip’s luminance or brightness values, the Luma Key automatically finds the negative space in a clip, making the tool perfect for placing logos, brightening whites, or adding some pop into your final cut with some interesting transitions.

Gradient Wipe – Next Level Dissolve

Acting as a transition between two stacked clips, the Gradient Wipe effect used as a dissolve transition offers a visually striking melting effect that takes the well-known effect to the next level. What makes this effect different from a standard “dissolve” is that it melts aways the blacks (or whites) faster than other colors, depending on how you tune the effect.

The art of transition – Stylizing with Corner Pin

Transitions aren't just about moving from one clip to another; they're an opportunity to inject style into your edits. The Corner Pin, used creatively and with some professional finesse, can produce unique and interesting transitions. It may be a clunky process to achieve these transitions, but the result is something that is sure to intrigue. Check it out in action.

Transform – The Swiss Army Knife

This effect is more than just a "standard" tool and can be used in a multitude of ways in the editing process. It's a multi-purpose powerhouse that simplifies the complex layering of effects, effectively accelerating your editing speed. Whether you're cropping, feathering edges, or flipping your clips, transform gets the job done efficiently and effectively.

Motion Blur – A cinematic secret weapon

Evoke some cinematic flavor in your next edit with the built-in Motion Blur effect hidden within Premiere Pro. Crank up the shutter speed to 360, and watch the visuals start to blur. You’ll find this tool in the Transform effect menu and it can bring dynamic feel to your project. Be cautious though, Motion Blur affects all media that’s placed into the timeline—so use it sparingly and be sure to constraint the effect to only the necessary layers.

Cropping with Transform – Precision moves made easy

The Crop effect, when paired correctly with Transform, makes cropping a breeze, especially if you’re trying to accomplish dynamic picture-in-picture edit. With this tool, simply reposition your cropped video within the predefined boundaries from your Transform effect to ensure your clip stays within its boundaries.

Track Matte Keys – Bringing Text to Life

Breathe some life into your text with Track Matte Keys. This tactic enables a video to appear within text, perfect for eye-catching title cards and branded content.

LEVELS

For video editors first diving into coloring—it’s not as scary as it looks. Anyone with Photoshop, Lightroom or After Effects experience will find these adjustments really familiar; in Premiere Pro, however, level adjustments are not paired with the same visual interface and need to be entered in numerical values. To kick things off, we’re going to dive back into the basics.

What are the different color values you need to know about? Every video file has red, green, and blue (RGB) values for input, output, and gamma. The breakdown is as follows:

  • (RGB) Black Input Level – Increase the value to crush the blacks.
  • (RGB) White Input Level – Decrease the value to blow out the whites.
  • (RGB) Black Output Level – Increasing the value removes blacks, resulting in a washed-out image.
  • (RGB) White Output Level – Decreasing the value removes whites, resulting in a darker image.
  • (RGB) Gamma – Adjust the gamma to brighten or darken the entire image.

Compositing

When compositing, levels are the nuanced adjustments that make two shots seamlessly blend together. When pairing two clips together—like in the case of a screen replacement or stitching two clips together in a transition sequence—it’s vital to ensure that both clips have the same (or complementary) value outputs. These are the details that make a clip feel like it belongs.

While levels play an important role in the compositing process, there also are plenty of other ways to use this handy, advanced technique to your advantage in the editing bay…

Glow Effect Transitions – Transforming Sequences

Simple glow effects can have a big impact on dynamic sequences. Manipulating the white input levels on an adjustment layer makes everything beneath it radiate while a touch of Gaussian blur—a widely used feathering technique—and can easily and quickly add a flare to your edit.

The Art of Fade – Stylish 'Dip to Black' Transitions

If you’re looking to ditch the standard fade, considering embracing the 'dip to black' transition. Keyframing black or white values opens up different avenues to manipulate the classic fade. Explore what happens when you crank the white/black values, then tweak the gamma. By completing this final step, the software will make the whites and blacks linger on the screen.

Day-to-Night – Cinematic Time Warping

Manipulate time and transform footage shot during the day into eerie, darker scenes shot at night. With controlled exposure reduction, clever temperature adjustments, and a touch of simulated moonlight, you can create enchanting night scenes right in the editing suite.

The Color Whisperer – Desaturating Purples

Every frame has color “artifacts” that affect the clip. Now, you can turn those pesky bits of data into a tool that works to enhance your canvas. With some strategic desaturation, removing purple tints from grays in your frame, for example, allows you to further amplify the whites/greys, delivering a cleaner, polished visual experience.

Paint with Light – Creative Gradients

In art history, Rembrandt was the master of light. In Premiere Pro, you, too, can unlock the influence of painting with light with gradients. Lighten or darken specific parts of the frame to draw focus or create an atmosphere. From creating a foggy ambiance to isolating elements with a feathered mask, gradients empower you to be the visual artist of your story.

Monochrome Magic - One Color Fill

Looking for a totally futuristic way to color-wash your timeline? One-color fills in Premiere Pro are perfect for night shots that require an otherworldly, futuristic atmosphere, and this tool can complete the job in just a few steps. It takes all the light sources in a given frame(s) and paints those with the same color (of your choice), creating a Tron-like aesthetic.

TOOLS

Hidden within Adobe Premiere Pro’s many menus are a bounty of simple and complex tools for video editors to employ during the editing process. Here, we’re outlining some of the more advanced techniques that post production professionals can use:

Font Flexibility – Project-Wide Font Replacement

Experience the ease of changing typefaces across your entire project with the Replace Fonts function. Whitewashing your timeline with a new font is as simple as using the built-in dropdown menu directly in Premiere Pro, saving you precious editing time.

Fast-Paced Edits – Replace with Clip

This function acts a replacement technique to the classic three-point edit and lets you speed through your cuts by eliminating the need to set in and out points. Make it even faster with keyboard shortcuts for an even more efficient workflow.

Mastering Tempo - Rate Stretch Tool

The Rate Stretch Tool is your solution for quick and accurate speed adjustments, whether dealing with slowed-down or sped-up footage. Don't just guess and check with the speed/duration tool. Speed up or slow down sequences precisely, maintaining pacing and keeping your timeline neat.

Audio Harmony  - Audio Track Mixer

Simplify your audio workflow with the Audio Track Mixer built-in to Adobe Premiere Pro. This tool allows you to balance and blend different audio clips, control individual track volumes, and apply effects to each channel, allowing editors to make important audio adjustments without needing any proper audio design training.

Audio Overview - The Loudness Radar

The Loudness Radar is your in-app companion for a quick, comprehensive look at your project's audio volume, AKA how loud it will play when a audience-member presses . While not a replacement for professional audio work or mastering, it offers a helpful overview of your sound landscape for in-process referencing.

Clean Edits – Cherry-Picking Your Timeline

This technique is all about organizing your footage efficiently. The cherry-picking technique segregate your best shots quickly from the B-roll, and structure your timeline in a layered, organized manner. This method allows for finer, more refined edits in later stages, and makes it immensely easier for editors to find the clips they need down the line.

Group Dynamics – Creative Timeline Nesting

Nesting, or grouping footage into its own sequence, provides an efficient way to manage large projects. By turning multiple clips into one, you streamline your timeline and create a more organized editing environment. While it’s not a tool built-in to Adobe Premiere Pro, this advanced technique can help simplify complex timelines with just a few clicks.

Smooth Slow-Mo – Time Remapping and Speed Ramping

Master the art of the perfect speed ramp to create a seamless, smooth slow-motion effect. Gradually ramp up or down to avoid jarring speed changes, giving your edits a professional, cinematic feel.

Want to learn more about Adobe Premiere Pro, check out these 22 hotkeys and shortcuts that’ll ensure you’re editing at light speed.

The Editors

There are so many great minds contributing to Suite's content & blog, the editors are here to share their perspective.

It's time to get back to creating

Join our community
Subscribe below.

Four reasons to subscribe to our newsletter

Topic

Edit Bay

23 advanced video tricks for Premiere Pro: Tools and tips for editors who want to shake up the timeline

Video editing shouldn't be stale work.

Every time you sit in front of your computer screen and open up a Premiere Pro timeline, we’re certain there’s an excitement that courses through you. But long hours in the edit bay can prove difficult, especially when you’re trying to stay creative. Video editors and post production creatives can fall into trends, utilizing the same (or similar) techniques whenever a project lands on their desk. While utilizing certain editing techniques repeatedly might eventually define a creative’s unique style, it’s important—no matter your scope of post production creative work—to help shake up the norm. In this post, we’ve rounded up some of the most useful advanced editing tricks hidden throughout Premiere Pro, so editors of every skill level can find new avenues of expression and creativity.

EFFECTS

Luma Key – Radiant color and eye-catching effects

By examining a clip’s luminance or brightness values, the Luma Key automatically finds the negative space in a clip, making the tool perfect for placing logos, brightening whites, or adding some pop into your final cut with some interesting transitions.

Gradient Wipe – Next Level Dissolve

Acting as a transition between two stacked clips, the Gradient Wipe effect used as a dissolve transition offers a visually striking melting effect that takes the well-known effect to the next level. What makes this effect different from a standard “dissolve” is that it melts aways the blacks (or whites) faster than other colors, depending on how you tune the effect.

The art of transition – Stylizing with Corner Pin

Transitions aren't just about moving from one clip to another; they're an opportunity to inject style into your edits. The Corner Pin, used creatively and with some professional finesse, can produce unique and interesting transitions. It may be a clunky process to achieve these transitions, but the result is something that is sure to intrigue. Check it out in action.

Transform – The Swiss Army Knife

This effect is more than just a "standard" tool and can be used in a multitude of ways in the editing process. It's a multi-purpose powerhouse that simplifies the complex layering of effects, effectively accelerating your editing speed. Whether you're cropping, feathering edges, or flipping your clips, transform gets the job done efficiently and effectively.

Motion Blur – A cinematic secret weapon

Evoke some cinematic flavor in your next edit with the built-in Motion Blur effect hidden within Premiere Pro. Crank up the shutter speed to 360, and watch the visuals start to blur. You’ll find this tool in the Transform effect menu and it can bring dynamic feel to your project. Be cautious though, Motion Blur affects all media that’s placed into the timeline—so use it sparingly and be sure to constraint the effect to only the necessary layers.

Cropping with Transform – Precision moves made easy

The Crop effect, when paired correctly with Transform, makes cropping a breeze, especially if you’re trying to accomplish dynamic picture-in-picture edit. With this tool, simply reposition your cropped video within the predefined boundaries from your Transform effect to ensure your clip stays within its boundaries.

Track Matte Keys – Bringing Text to Life

Breathe some life into your text with Track Matte Keys. This tactic enables a video to appear within text, perfect for eye-catching title cards and branded content.

LEVELS

For video editors first diving into coloring—it’s not as scary as it looks. Anyone with Photoshop, Lightroom or After Effects experience will find these adjustments really familiar; in Premiere Pro, however, level adjustments are not paired with the same visual interface and need to be entered in numerical values. To kick things off, we’re going to dive back into the basics.

What are the different color values you need to know about? Every video file has red, green, and blue (RGB) values for input, output, and gamma. The breakdown is as follows:

  • (RGB) Black Input Level – Increase the value to crush the blacks.
  • (RGB) White Input Level – Decrease the value to blow out the whites.
  • (RGB) Black Output Level – Increasing the value removes blacks, resulting in a washed-out image.
  • (RGB) White Output Level – Decreasing the value removes whites, resulting in a darker image.
  • (RGB) Gamma – Adjust the gamma to brighten or darken the entire image.

Compositing

When compositing, levels are the nuanced adjustments that make two shots seamlessly blend together. When pairing two clips together—like in the case of a screen replacement or stitching two clips together in a transition sequence—it’s vital to ensure that both clips have the same (or complementary) value outputs. These are the details that make a clip feel like it belongs.

While levels play an important role in the compositing process, there also are plenty of other ways to use this handy, advanced technique to your advantage in the editing bay…

Glow Effect Transitions – Transforming Sequences

Simple glow effects can have a big impact on dynamic sequences. Manipulating the white input levels on an adjustment layer makes everything beneath it radiate while a touch of Gaussian blur—a widely used feathering technique—and can easily and quickly add a flare to your edit.

The Art of Fade – Stylish 'Dip to Black' Transitions

If you’re looking to ditch the standard fade, considering embracing the 'dip to black' transition. Keyframing black or white values opens up different avenues to manipulate the classic fade. Explore what happens when you crank the white/black values, then tweak the gamma. By completing this final step, the software will make the whites and blacks linger on the screen.

Day-to-Night – Cinematic Time Warping

Manipulate time and transform footage shot during the day into eerie, darker scenes shot at night. With controlled exposure reduction, clever temperature adjustments, and a touch of simulated moonlight, you can create enchanting night scenes right in the editing suite.

The Color Whisperer – Desaturating Purples

Every frame has color “artifacts” that affect the clip. Now, you can turn those pesky bits of data into a tool that works to enhance your canvas. With some strategic desaturation, removing purple tints from grays in your frame, for example, allows you to further amplify the whites/greys, delivering a cleaner, polished visual experience.

Paint with Light – Creative Gradients

In art history, Rembrandt was the master of light. In Premiere Pro, you, too, can unlock the influence of painting with light with gradients. Lighten or darken specific parts of the frame to draw focus or create an atmosphere. From creating a foggy ambiance to isolating elements with a feathered mask, gradients empower you to be the visual artist of your story.

Monochrome Magic - One Color Fill

Looking for a totally futuristic way to color-wash your timeline? One-color fills in Premiere Pro are perfect for night shots that require an otherworldly, futuristic atmosphere, and this tool can complete the job in just a few steps. It takes all the light sources in a given frame(s) and paints those with the same color (of your choice), creating a Tron-like aesthetic.

TOOLS

Hidden within Adobe Premiere Pro’s many menus are a bounty of simple and complex tools for video editors to employ during the editing process. Here, we’re outlining some of the more advanced techniques that post production professionals can use:

Font Flexibility – Project-Wide Font Replacement

Experience the ease of changing typefaces across your entire project with the Replace Fonts function. Whitewashing your timeline with a new font is as simple as using the built-in dropdown menu directly in Premiere Pro, saving you precious editing time.

Fast-Paced Edits – Replace with Clip

This function acts a replacement technique to the classic three-point edit and lets you speed through your cuts by eliminating the need to set in and out points. Make it even faster with keyboard shortcuts for an even more efficient workflow.

Mastering Tempo - Rate Stretch Tool

The Rate Stretch Tool is your solution for quick and accurate speed adjustments, whether dealing with slowed-down or sped-up footage. Don't just guess and check with the speed/duration tool. Speed up or slow down sequences precisely, maintaining pacing and keeping your timeline neat.

Audio Harmony  - Audio Track Mixer

Simplify your audio workflow with the Audio Track Mixer built-in to Adobe Premiere Pro. This tool allows you to balance and blend different audio clips, control individual track volumes, and apply effects to each channel, allowing editors to make important audio adjustments without needing any proper audio design training.

Audio Overview - The Loudness Radar

The Loudness Radar is your in-app companion for a quick, comprehensive look at your project's audio volume, AKA how loud it will play when a audience-member presses . While not a replacement for professional audio work or mastering, it offers a helpful overview of your sound landscape for in-process referencing.

Clean Edits – Cherry-Picking Your Timeline

This technique is all about organizing your footage efficiently. The cherry-picking technique segregate your best shots quickly from the B-roll, and structure your timeline in a layered, organized manner. This method allows for finer, more refined edits in later stages, and makes it immensely easier for editors to find the clips they need down the line.

Group Dynamics – Creative Timeline Nesting

Nesting, or grouping footage into its own sequence, provides an efficient way to manage large projects. By turning multiple clips into one, you streamline your timeline and create a more organized editing environment. While it’s not a tool built-in to Adobe Premiere Pro, this advanced technique can help simplify complex timelines with just a few clicks.

Smooth Slow-Mo – Time Remapping and Speed Ramping

Master the art of the perfect speed ramp to create a seamless, smooth slow-motion effect. Gradually ramp up or down to avoid jarring speed changes, giving your edits a professional, cinematic feel.

Want to learn more about Adobe Premiere Pro, check out these 22 hotkeys and shortcuts that’ll ensure you’re editing at light speed.

The Editors

There are so many great minds contributing to Suite's content & blog, the editors are here to share their perspective.

Unleash the power of your creatives
Suite Studios Cloud based editing and post production

Join our community
Subscribe now.

Four reasons to subscribe to our newsletter

The Editors

June 5, 2023

5 Minutes

23 advanced video tricks for Premiere Pro: Tools and tips for editors who want to shake up the timeline

Video editing shouldn't be stale work.

Every time you sit in front of your computer screen and open up a Premiere Pro timeline, we’re certain there’s an excitement that courses through you. But long hours in the edit bay can prove difficult, especially when you’re trying to stay creative. Video editors and post production creatives can fall into trends, utilizing the same (or similar) techniques whenever a project lands on their desk. While utilizing certain editing techniques repeatedly might eventually define a creative’s unique style, it’s important—no matter your scope of post production creative work—to help shake up the norm. In this post, we’ve rounded up some of the most useful advanced editing tricks hidden throughout Premiere Pro, so editors of every skill level can find new avenues of expression and creativity.

EFFECTS

Luma Key – Radiant color and eye-catching effects

By examining a clip’s luminance or brightness values, the Luma Key automatically finds the negative space in a clip, making the tool perfect for placing logos, brightening whites, or adding some pop into your final cut with some interesting transitions.

Gradient Wipe – Next Level Dissolve

Acting as a transition between two stacked clips, the Gradient Wipe effect used as a dissolve transition offers a visually striking melting effect that takes the well-known effect to the next level. What makes this effect different from a standard “dissolve” is that it melts aways the blacks (or whites) faster than other colors, depending on how you tune the effect.

The art of transition – Stylizing with Corner Pin

Transitions aren't just about moving from one clip to another; they're an opportunity to inject style into your edits. The Corner Pin, used creatively and with some professional finesse, can produce unique and interesting transitions. It may be a clunky process to achieve these transitions, but the result is something that is sure to intrigue. Check it out in action.

Transform – The Swiss Army Knife

This effect is more than just a "standard" tool and can be used in a multitude of ways in the editing process. It's a multi-purpose powerhouse that simplifies the complex layering of effects, effectively accelerating your editing speed. Whether you're cropping, feathering edges, or flipping your clips, transform gets the job done efficiently and effectively.

Motion Blur – A cinematic secret weapon

Evoke some cinematic flavor in your next edit with the built-in Motion Blur effect hidden within Premiere Pro. Crank up the shutter speed to 360, and watch the visuals start to blur. You’ll find this tool in the Transform effect menu and it can bring dynamic feel to your project. Be cautious though, Motion Blur affects all media that’s placed into the timeline—so use it sparingly and be sure to constraint the effect to only the necessary layers.

Cropping with Transform – Precision moves made easy

The Crop effect, when paired correctly with Transform, makes cropping a breeze, especially if you’re trying to accomplish dynamic picture-in-picture edit. With this tool, simply reposition your cropped video within the predefined boundaries from your Transform effect to ensure your clip stays within its boundaries.

Track Matte Keys – Bringing Text to Life

Breathe some life into your text with Track Matte Keys. This tactic enables a video to appear within text, perfect for eye-catching title cards and branded content.

LEVELS

For video editors first diving into coloring—it’s not as scary as it looks. Anyone with Photoshop, Lightroom or After Effects experience will find these adjustments really familiar; in Premiere Pro, however, level adjustments are not paired with the same visual interface and need to be entered in numerical values. To kick things off, we’re going to dive back into the basics.

What are the different color values you need to know about? Every video file has red, green, and blue (RGB) values for input, output, and gamma. The breakdown is as follows:

  • (RGB) Black Input Level – Increase the value to crush the blacks.
  • (RGB) White Input Level – Decrease the value to blow out the whites.
  • (RGB) Black Output Level – Increasing the value removes blacks, resulting in a washed-out image.
  • (RGB) White Output Level – Decreasing the value removes whites, resulting in a darker image.
  • (RGB) Gamma – Adjust the gamma to brighten or darken the entire image.

Compositing

When compositing, levels are the nuanced adjustments that make two shots seamlessly blend together. When pairing two clips together—like in the case of a screen replacement or stitching two clips together in a transition sequence—it’s vital to ensure that both clips have the same (or complementary) value outputs. These are the details that make a clip feel like it belongs.

While levels play an important role in the compositing process, there also are plenty of other ways to use this handy, advanced technique to your advantage in the editing bay…

Glow Effect Transitions – Transforming Sequences

Simple glow effects can have a big impact on dynamic sequences. Manipulating the white input levels on an adjustment layer makes everything beneath it radiate while a touch of Gaussian blur—a widely used feathering technique—and can easily and quickly add a flare to your edit.

The Art of Fade – Stylish 'Dip to Black' Transitions

If you’re looking to ditch the standard fade, considering embracing the 'dip to black' transition. Keyframing black or white values opens up different avenues to manipulate the classic fade. Explore what happens when you crank the white/black values, then tweak the gamma. By completing this final step, the software will make the whites and blacks linger on the screen.

Day-to-Night – Cinematic Time Warping

Manipulate time and transform footage shot during the day into eerie, darker scenes shot at night. With controlled exposure reduction, clever temperature adjustments, and a touch of simulated moonlight, you can create enchanting night scenes right in the editing suite.

The Color Whisperer – Desaturating Purples

Every frame has color “artifacts” that affect the clip. Now, you can turn those pesky bits of data into a tool that works to enhance your canvas. With some strategic desaturation, removing purple tints from grays in your frame, for example, allows you to further amplify the whites/greys, delivering a cleaner, polished visual experience.

Paint with Light – Creative Gradients

In art history, Rembrandt was the master of light. In Premiere Pro, you, too, can unlock the influence of painting with light with gradients. Lighten or darken specific parts of the frame to draw focus or create an atmosphere. From creating a foggy ambiance to isolating elements with a feathered mask, gradients empower you to be the visual artist of your story.

Monochrome Magic - One Color Fill

Looking for a totally futuristic way to color-wash your timeline? One-color fills in Premiere Pro are perfect for night shots that require an otherworldly, futuristic atmosphere, and this tool can complete the job in just a few steps. It takes all the light sources in a given frame(s) and paints those with the same color (of your choice), creating a Tron-like aesthetic.

TOOLS

Hidden within Adobe Premiere Pro’s many menus are a bounty of simple and complex tools for video editors to employ during the editing process. Here, we’re outlining some of the more advanced techniques that post production professionals can use:

Font Flexibility – Project-Wide Font Replacement

Experience the ease of changing typefaces across your entire project with the Replace Fonts function. Whitewashing your timeline with a new font is as simple as using the built-in dropdown menu directly in Premiere Pro, saving you precious editing time.

Fast-Paced Edits – Replace with Clip

This function acts a replacement technique to the classic three-point edit and lets you speed through your cuts by eliminating the need to set in and out points. Make it even faster with keyboard shortcuts for an even more efficient workflow.

Mastering Tempo - Rate Stretch Tool

The Rate Stretch Tool is your solution for quick and accurate speed adjustments, whether dealing with slowed-down or sped-up footage. Don't just guess and check with the speed/duration tool. Speed up or slow down sequences precisely, maintaining pacing and keeping your timeline neat.

Audio Harmony  - Audio Track Mixer

Simplify your audio workflow with the Audio Track Mixer built-in to Adobe Premiere Pro. This tool allows you to balance and blend different audio clips, control individual track volumes, and apply effects to each channel, allowing editors to make important audio adjustments without needing any proper audio design training.

Audio Overview - The Loudness Radar

The Loudness Radar is your in-app companion for a quick, comprehensive look at your project's audio volume, AKA how loud it will play when a audience-member presses . While not a replacement for professional audio work or mastering, it offers a helpful overview of your sound landscape for in-process referencing.

Clean Edits – Cherry-Picking Your Timeline

This technique is all about organizing your footage efficiently. The cherry-picking technique segregate your best shots quickly from the B-roll, and structure your timeline in a layered, organized manner. This method allows for finer, more refined edits in later stages, and makes it immensely easier for editors to find the clips they need down the line.

Group Dynamics – Creative Timeline Nesting

Nesting, or grouping footage into its own sequence, provides an efficient way to manage large projects. By turning multiple clips into one, you streamline your timeline and create a more organized editing environment. While it’s not a tool built-in to Adobe Premiere Pro, this advanced technique can help simplify complex timelines with just a few clicks.

Smooth Slow-Mo – Time Remapping and Speed Ramping

Master the art of the perfect speed ramp to create a seamless, smooth slow-motion effect. Gradually ramp up or down to avoid jarring speed changes, giving your edits a professional, cinematic feel.

Want to learn more about Adobe Premiere Pro, check out these 22 hotkeys and shortcuts that’ll ensure you’re editing at light speed.

The Editors

There are so many great minds contributing to Suite's content & blog, the editors are here to share their perspective.

Move your team to Suite
Suite Studios Cloud based editing and post production

Join our community
Subscribe now.

Four reasons to subscribe to our newsletter

The Editors

June 5, 2023

5 Minutes

23 advanced video tricks for Premiere Pro: Tools and tips for editors who want to shake up the timeline

Video editing shouldn't be stale work.

Every time you sit in front of your computer screen and open up a Premiere Pro timeline, we’re certain there’s an excitement that courses through you. But long hours in the edit bay can prove difficult, especially when you’re trying to stay creative. Video editors and post production creatives can fall into trends, utilizing the same (or similar) techniques whenever a project lands on their desk. While utilizing certain editing techniques repeatedly might eventually define a creative’s unique style, it’s important—no matter your scope of post production creative work—to help shake up the norm. In this post, we’ve rounded up some of the most useful advanced editing tricks hidden throughout Premiere Pro, so editors of every skill level can find new avenues of expression and creativity.

EFFECTS

Luma Key – Radiant color and eye-catching effects

By examining a clip’s luminance or brightness values, the Luma Key automatically finds the negative space in a clip, making the tool perfect for placing logos, brightening whites, or adding some pop into your final cut with some interesting transitions.

Gradient Wipe – Next Level Dissolve

Acting as a transition between two stacked clips, the Gradient Wipe effect used as a dissolve transition offers a visually striking melting effect that takes the well-known effect to the next level. What makes this effect different from a standard “dissolve” is that it melts aways the blacks (or whites) faster than other colors, depending on how you tune the effect.

The art of transition – Stylizing with Corner Pin

Transitions aren't just about moving from one clip to another; they're an opportunity to inject style into your edits. The Corner Pin, used creatively and with some professional finesse, can produce unique and interesting transitions. It may be a clunky process to achieve these transitions, but the result is something that is sure to intrigue. Check it out in action.

Transform – The Swiss Army Knife

This effect is more than just a "standard" tool and can be used in a multitude of ways in the editing process. It's a multi-purpose powerhouse that simplifies the complex layering of effects, effectively accelerating your editing speed. Whether you're cropping, feathering edges, or flipping your clips, transform gets the job done efficiently and effectively.

Motion Blur – A cinematic secret weapon

Evoke some cinematic flavor in your next edit with the built-in Motion Blur effect hidden within Premiere Pro. Crank up the shutter speed to 360, and watch the visuals start to blur. You’ll find this tool in the Transform effect menu and it can bring dynamic feel to your project. Be cautious though, Motion Blur affects all media that’s placed into the timeline—so use it sparingly and be sure to constraint the effect to only the necessary layers.

Cropping with Transform – Precision moves made easy

The Crop effect, when paired correctly with Transform, makes cropping a breeze, especially if you’re trying to accomplish dynamic picture-in-picture edit. With this tool, simply reposition your cropped video within the predefined boundaries from your Transform effect to ensure your clip stays within its boundaries.

Track Matte Keys – Bringing Text to Life

Breathe some life into your text with Track Matte Keys. This tactic enables a video to appear within text, perfect for eye-catching title cards and branded content.

LEVELS

For video editors first diving into coloring—it’s not as scary as it looks. Anyone with Photoshop, Lightroom or After Effects experience will find these adjustments really familiar; in Premiere Pro, however, level adjustments are not paired with the same visual interface and need to be entered in numerical values. To kick things off, we’re going to dive back into the basics.

What are the different color values you need to know about? Every video file has red, green, and blue (RGB) values for input, output, and gamma. The breakdown is as follows:

  • (RGB) Black Input Level – Increase the value to crush the blacks.
  • (RGB) White Input Level – Decrease the value to blow out the whites.
  • (RGB) Black Output Level – Increasing the value removes blacks, resulting in a washed-out image.
  • (RGB) White Output Level – Decreasing the value removes whites, resulting in a darker image.
  • (RGB) Gamma – Adjust the gamma to brighten or darken the entire image.

Compositing

When compositing, levels are the nuanced adjustments that make two shots seamlessly blend together. When pairing two clips together—like in the case of a screen replacement or stitching two clips together in a transition sequence—it’s vital to ensure that both clips have the same (or complementary) value outputs. These are the details that make a clip feel like it belongs.

While levels play an important role in the compositing process, there also are plenty of other ways to use this handy, advanced technique to your advantage in the editing bay…

Glow Effect Transitions – Transforming Sequences

Simple glow effects can have a big impact on dynamic sequences. Manipulating the white input levels on an adjustment layer makes everything beneath it radiate while a touch of Gaussian blur—a widely used feathering technique—and can easily and quickly add a flare to your edit.

The Art of Fade – Stylish 'Dip to Black' Transitions

If you’re looking to ditch the standard fade, considering embracing the 'dip to black' transition. Keyframing black or white values opens up different avenues to manipulate the classic fade. Explore what happens when you crank the white/black values, then tweak the gamma. By completing this final step, the software will make the whites and blacks linger on the screen.

Day-to-Night – Cinematic Time Warping

Manipulate time and transform footage shot during the day into eerie, darker scenes shot at night. With controlled exposure reduction, clever temperature adjustments, and a touch of simulated moonlight, you can create enchanting night scenes right in the editing suite.

The Color Whisperer – Desaturating Purples

Every frame has color “artifacts” that affect the clip. Now, you can turn those pesky bits of data into a tool that works to enhance your canvas. With some strategic desaturation, removing purple tints from grays in your frame, for example, allows you to further amplify the whites/greys, delivering a cleaner, polished visual experience.

Paint with Light – Creative Gradients

In art history, Rembrandt was the master of light. In Premiere Pro, you, too, can unlock the influence of painting with light with gradients. Lighten or darken specific parts of the frame to draw focus or create an atmosphere. From creating a foggy ambiance to isolating elements with a feathered mask, gradients empower you to be the visual artist of your story.

Monochrome Magic - One Color Fill

Looking for a totally futuristic way to color-wash your timeline? One-color fills in Premiere Pro are perfect for night shots that require an otherworldly, futuristic atmosphere, and this tool can complete the job in just a few steps. It takes all the light sources in a given frame(s) and paints those with the same color (of your choice), creating a Tron-like aesthetic.

TOOLS

Hidden within Adobe Premiere Pro’s many menus are a bounty of simple and complex tools for video editors to employ during the editing process. Here, we’re outlining some of the more advanced techniques that post production professionals can use:

Font Flexibility – Project-Wide Font Replacement

Experience the ease of changing typefaces across your entire project with the Replace Fonts function. Whitewashing your timeline with a new font is as simple as using the built-in dropdown menu directly in Premiere Pro, saving you precious editing time.

Fast-Paced Edits – Replace with Clip

This function acts a replacement technique to the classic three-point edit and lets you speed through your cuts by eliminating the need to set in and out points. Make it even faster with keyboard shortcuts for an even more efficient workflow.

Mastering Tempo - Rate Stretch Tool

The Rate Stretch Tool is your solution for quick and accurate speed adjustments, whether dealing with slowed-down or sped-up footage. Don't just guess and check with the speed/duration tool. Speed up or slow down sequences precisely, maintaining pacing and keeping your timeline neat.

Audio Harmony  - Audio Track Mixer

Simplify your audio workflow with the Audio Track Mixer built-in to Adobe Premiere Pro. This tool allows you to balance and blend different audio clips, control individual track volumes, and apply effects to each channel, allowing editors to make important audio adjustments without needing any proper audio design training.

Audio Overview - The Loudness Radar

The Loudness Radar is your in-app companion for a quick, comprehensive look at your project's audio volume, AKA how loud it will play when a audience-member presses . While not a replacement for professional audio work or mastering, it offers a helpful overview of your sound landscape for in-process referencing.

Clean Edits – Cherry-Picking Your Timeline

This technique is all about organizing your footage efficiently. The cherry-picking technique segregate your best shots quickly from the B-roll, and structure your timeline in a layered, organized manner. This method allows for finer, more refined edits in later stages, and makes it immensely easier for editors to find the clips they need down the line.

Group Dynamics – Creative Timeline Nesting

Nesting, or grouping footage into its own sequence, provides an efficient way to manage large projects. By turning multiple clips into one, you streamline your timeline and create a more organized editing environment. While it’s not a tool built-in to Adobe Premiere Pro, this advanced technique can help simplify complex timelines with just a few clicks.

Smooth Slow-Mo – Time Remapping and Speed Ramping

Master the art of the perfect speed ramp to create a seamless, smooth slow-motion effect. Gradually ramp up or down to avoid jarring speed changes, giving your edits a professional, cinematic feel.

Want to learn more about Adobe Premiere Pro, check out these 22 hotkeys and shortcuts that’ll ensure you’re editing at light speed.

The Editors

There are so many great minds contributing to Suite's content & blog, the editors are here to share their perspective.

Find your flow state
Suite Studios Cloud based editing and post production

Don't you want to miss anymore? Subscribe now.

Four reasons to subscribe to our newsletter